In this guide, I’ll walk you through how to back up your entire WordPress site using the popular All-in-One WP Migration plugin. No coding required, and it only takes a few clicks. I’ve included screenshots for every step, so even beginners can follow along easily!
Let’s get started. 👇
✅ What You’ll Need:
- A WordPress site with admin access
- The All-in-One WP Migration plugin installed and activated
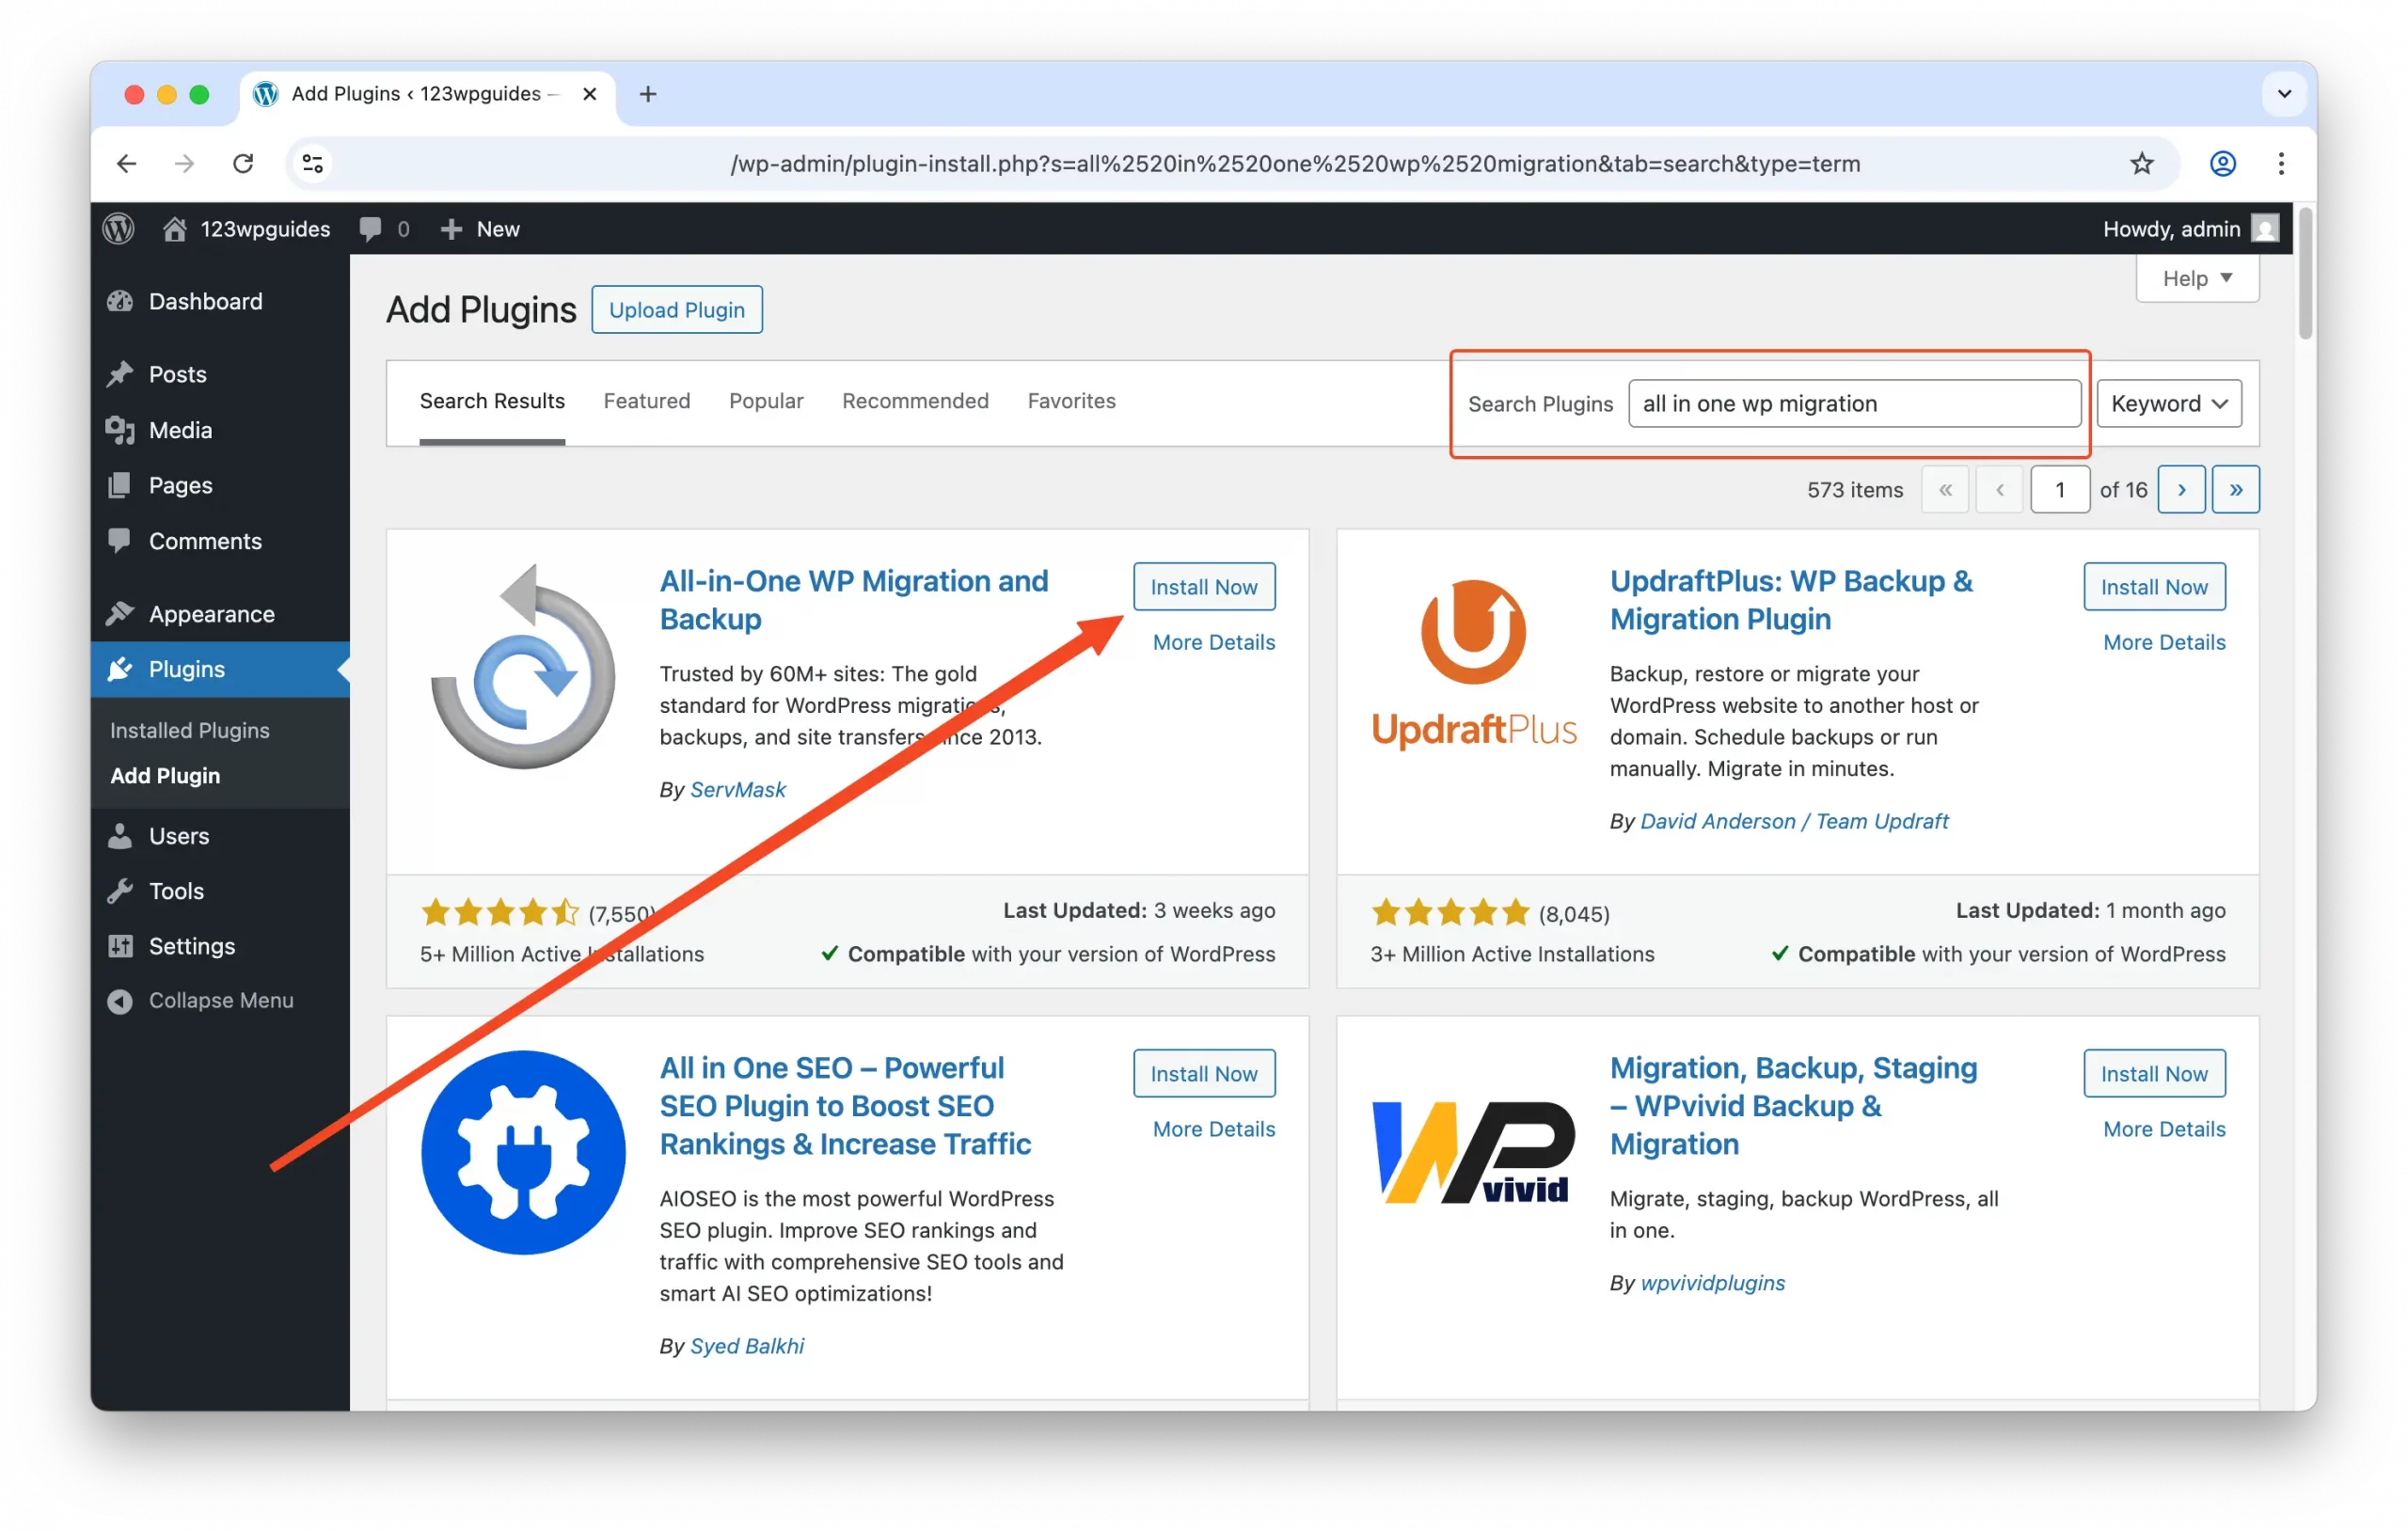
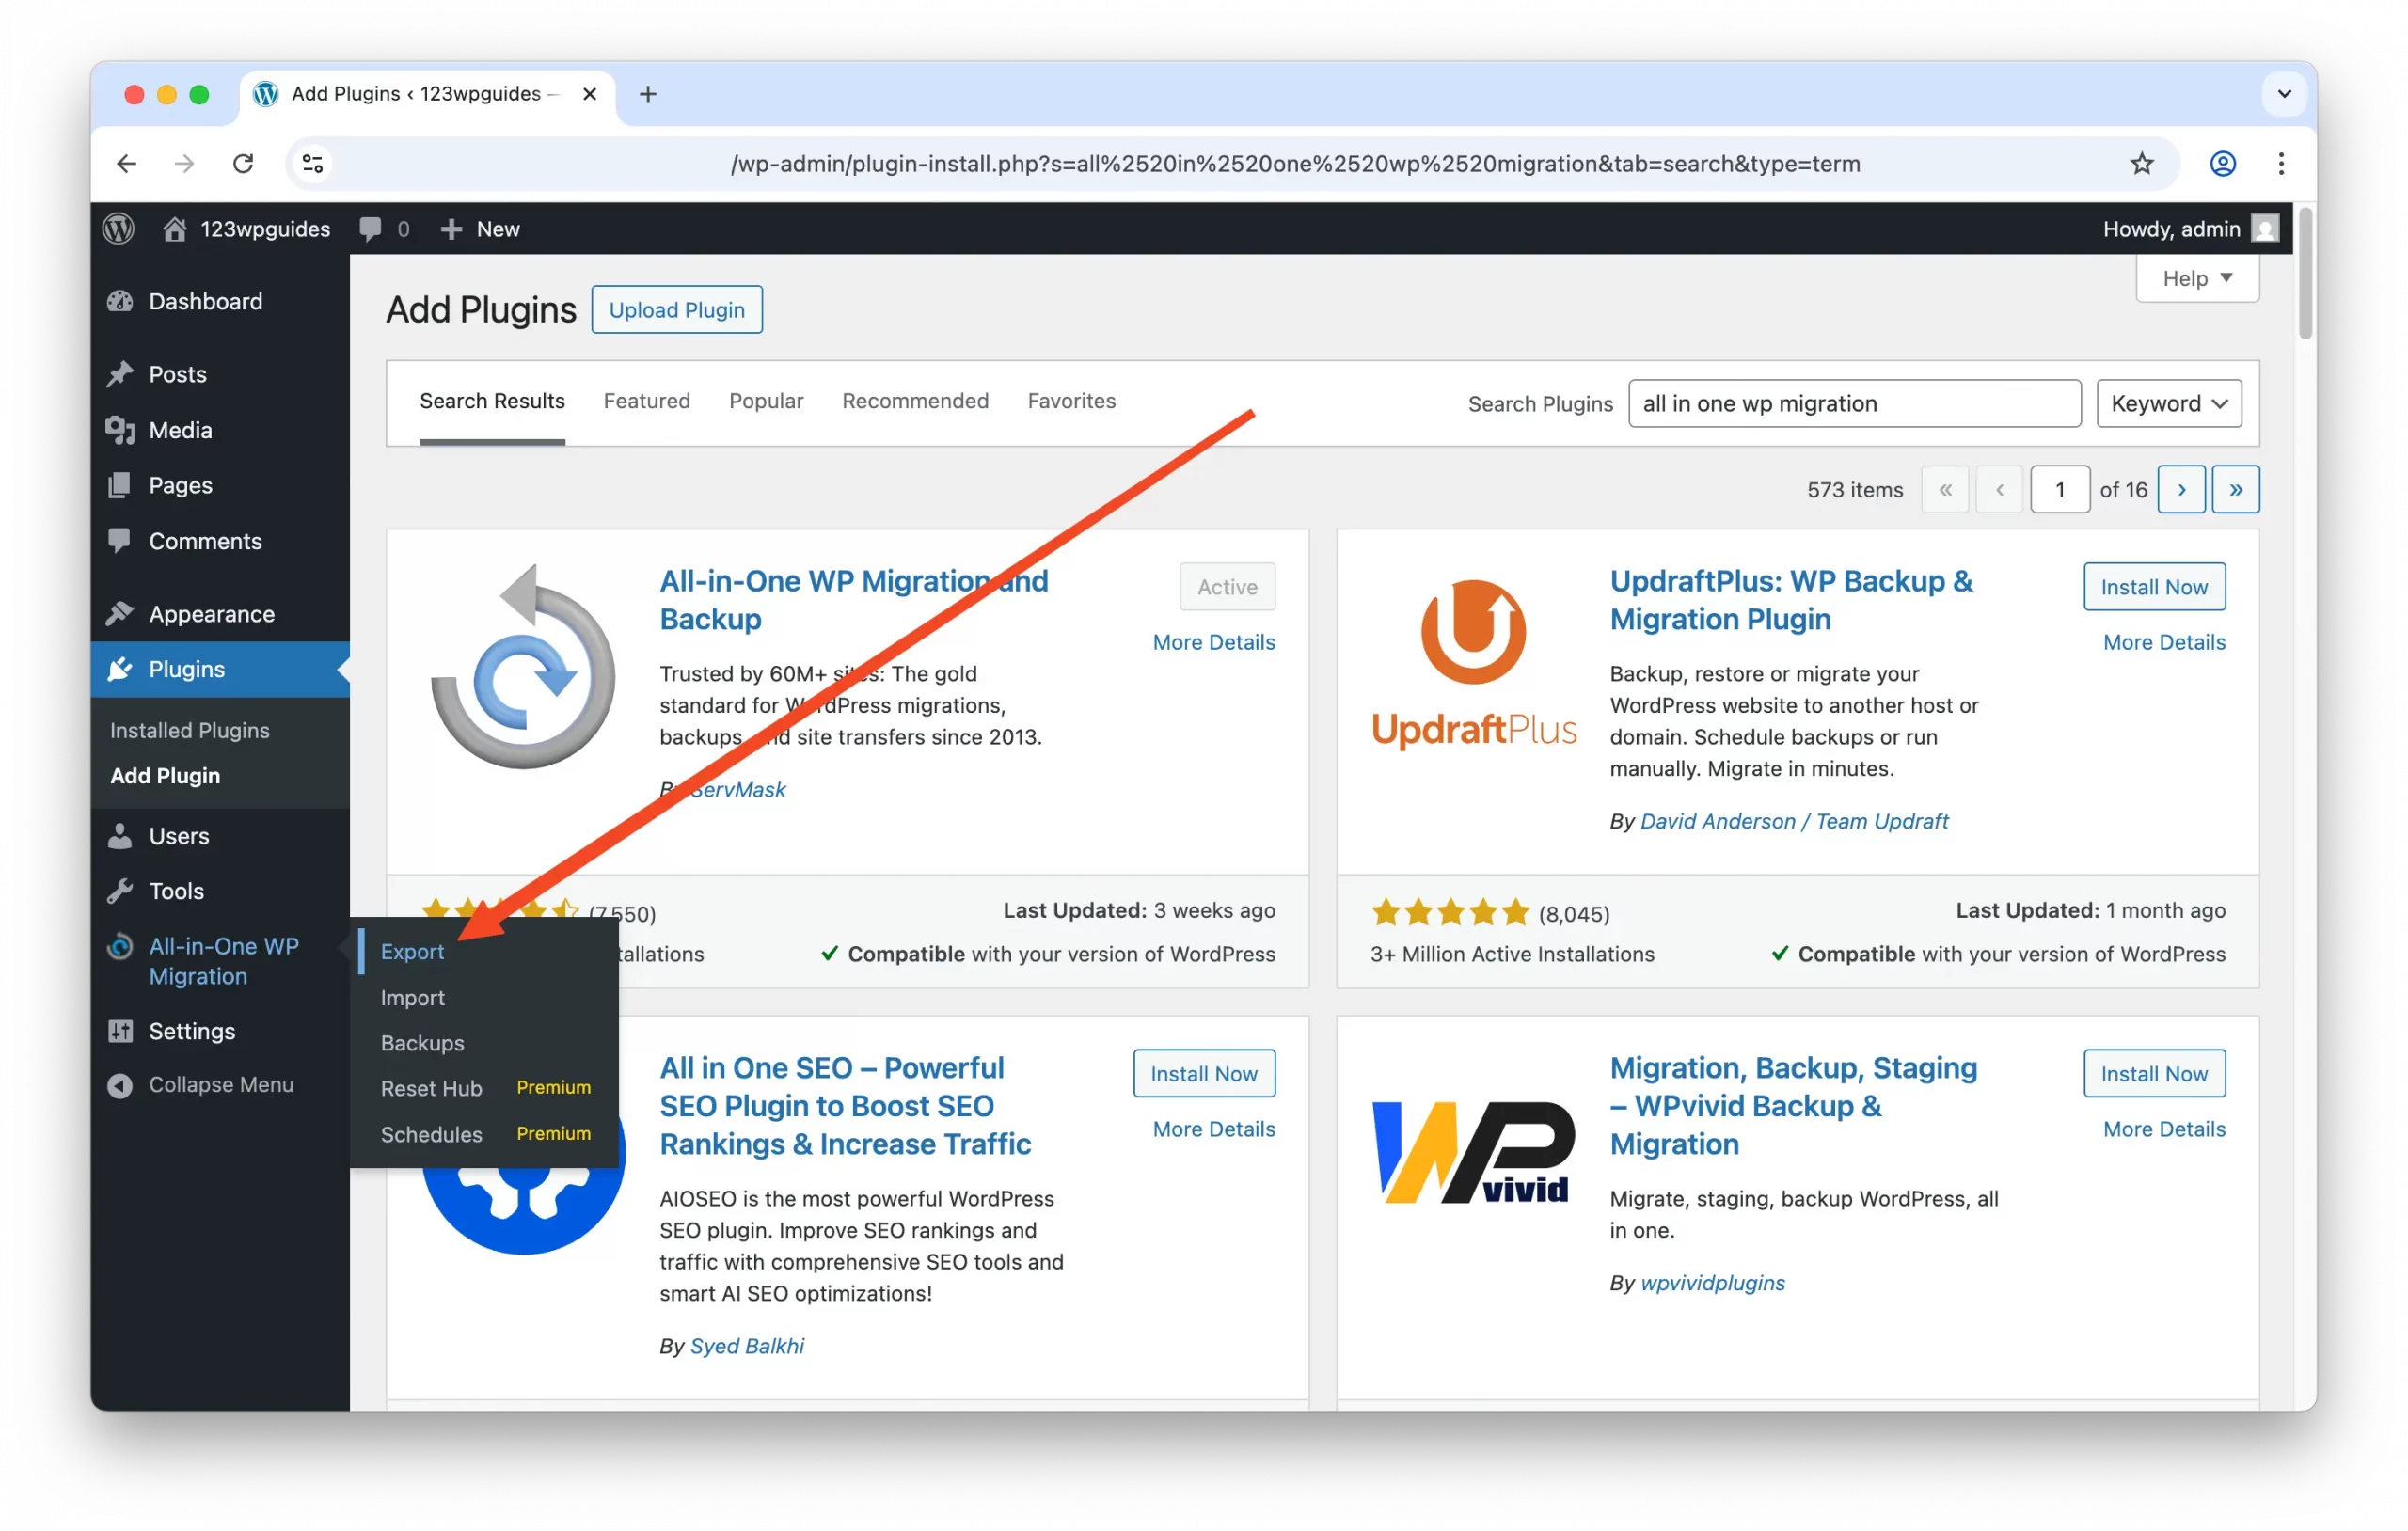
🛠 Step 1: Install All-in-One WP Migration
- Go to your WordPress Dashboard →
Plugins→Add New. - In the search bar, type “All-in-One WP Migration”.
- Click Install Now, then click Activate.
📁 Step 2: Open the Export Tool
- In your dashboard menu, go to
All-in-One WP Migration→Export. - You’ll be taken to the Export Site screen.
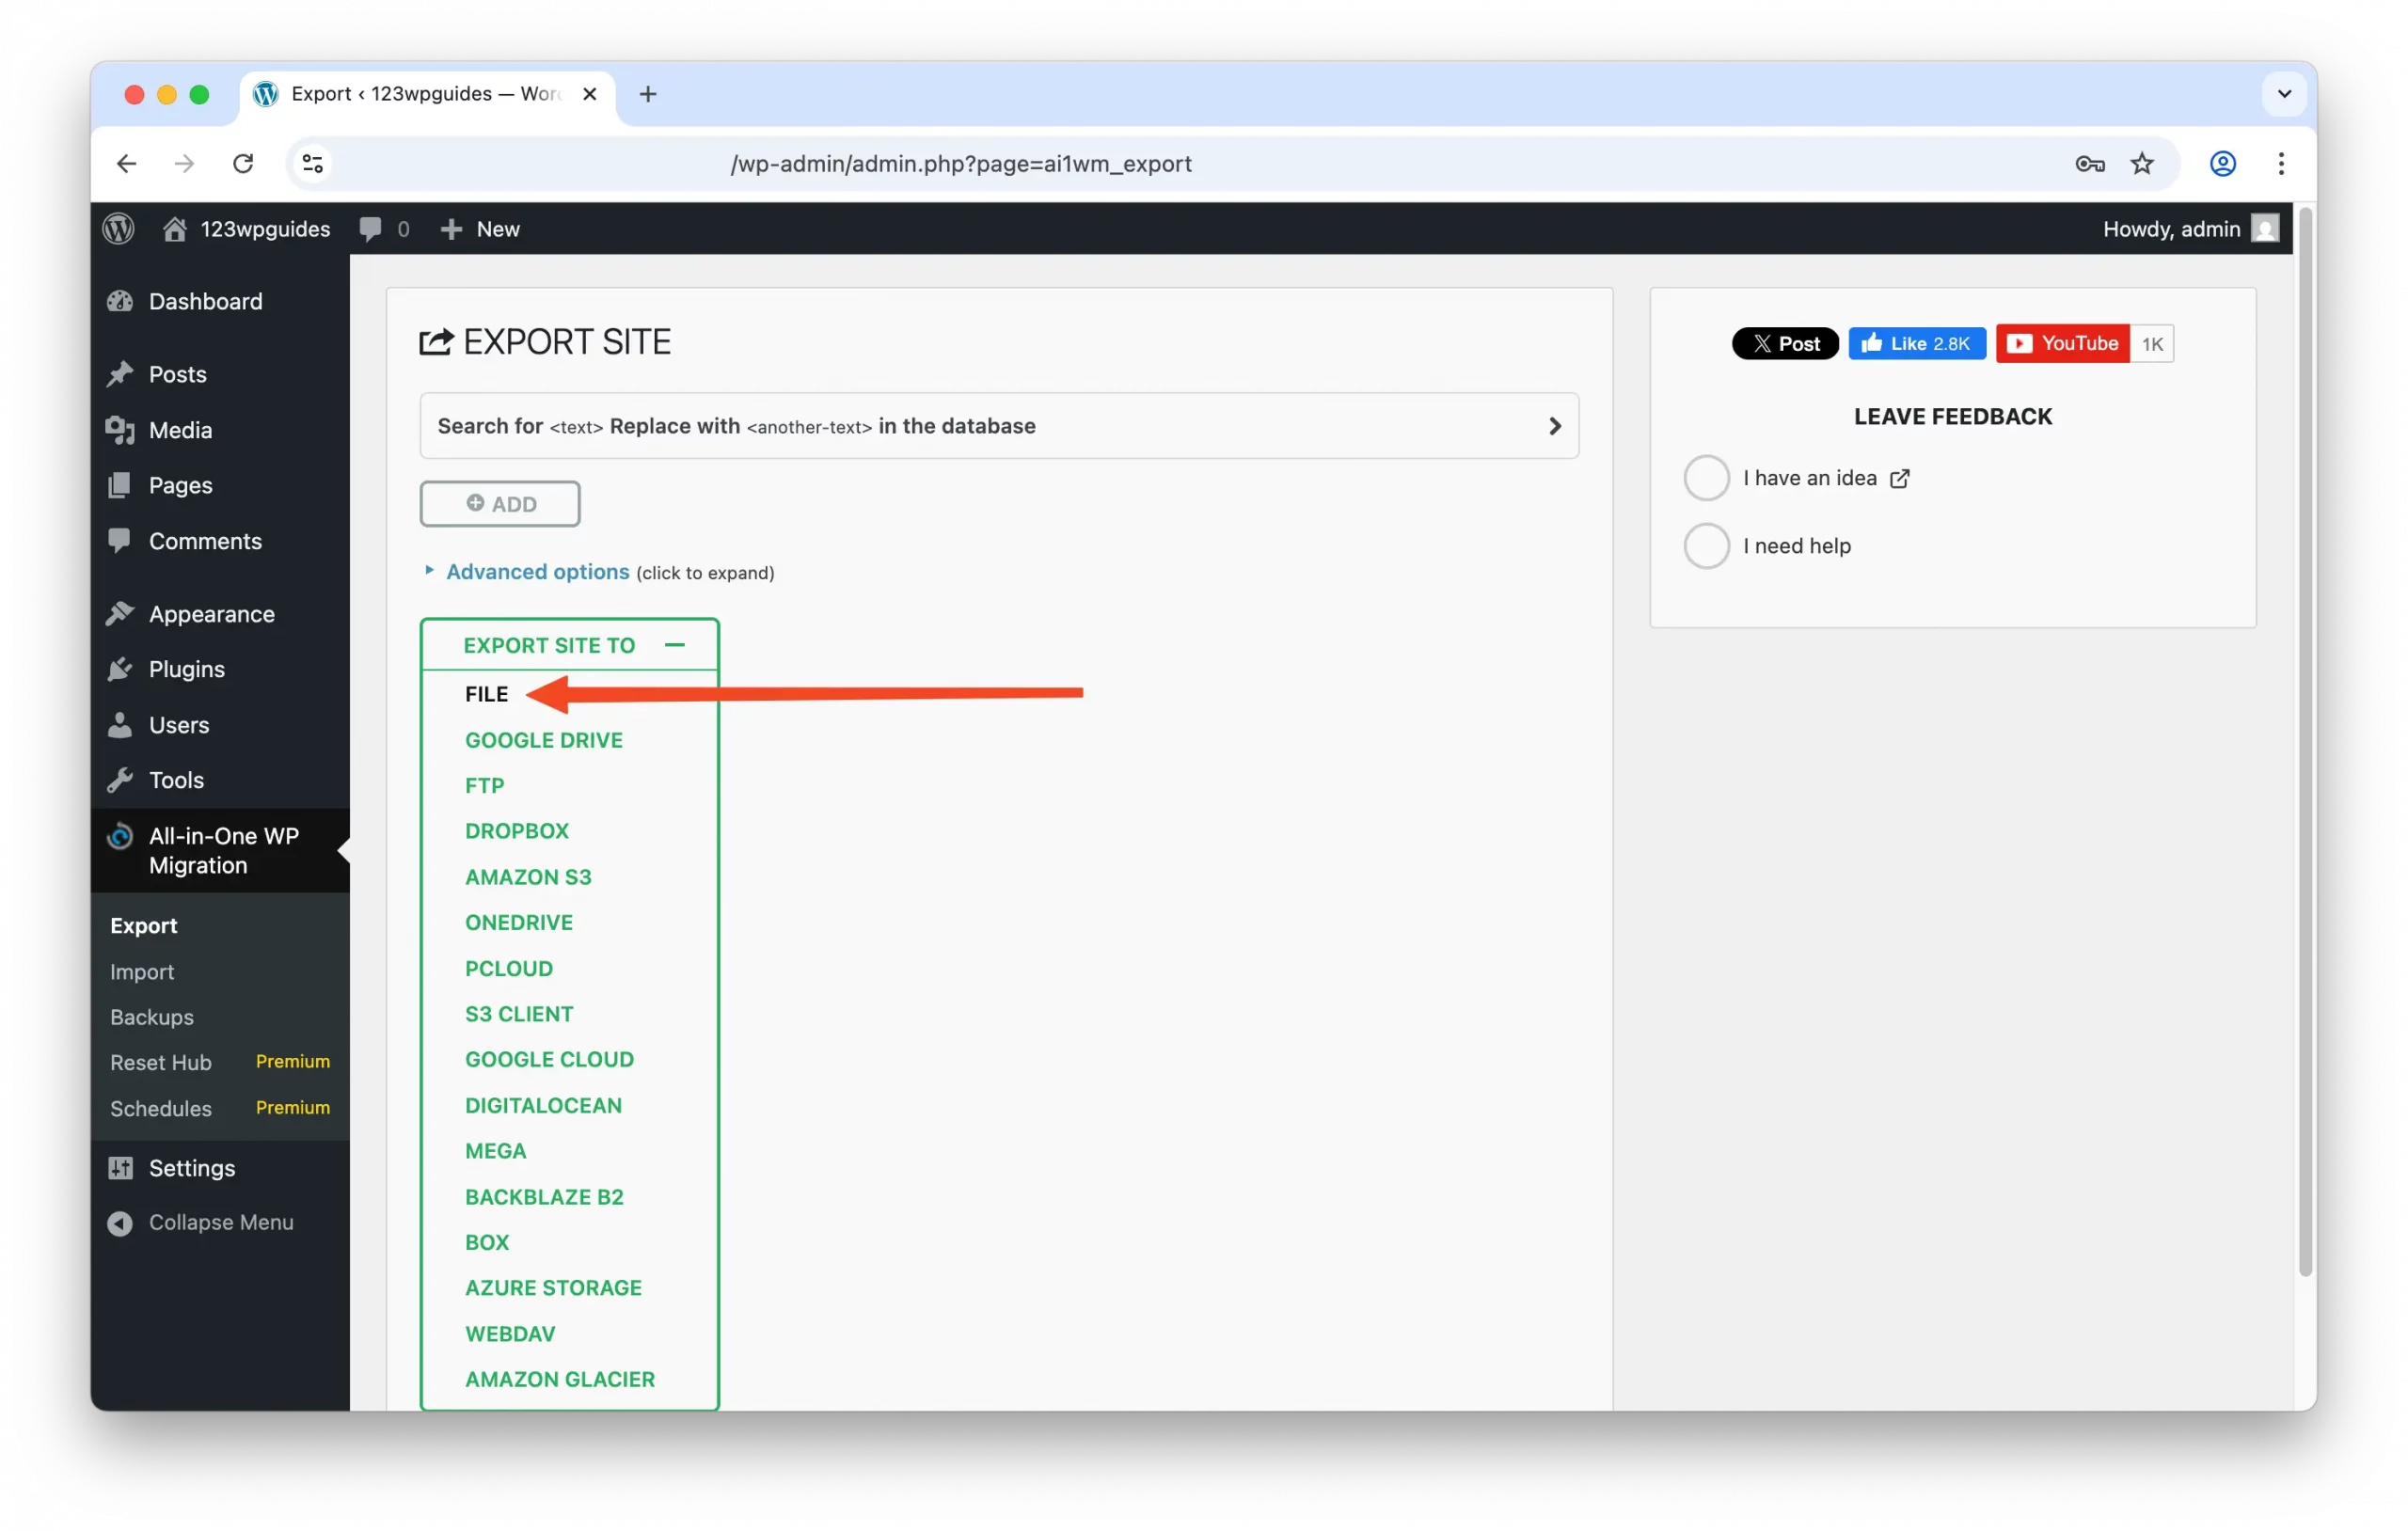
💾 Step 4: Export Your Site
- Click the green EXPORT SITE TO button.
- Choose File (most common for backups).
- The plugin will begin generating the backup.
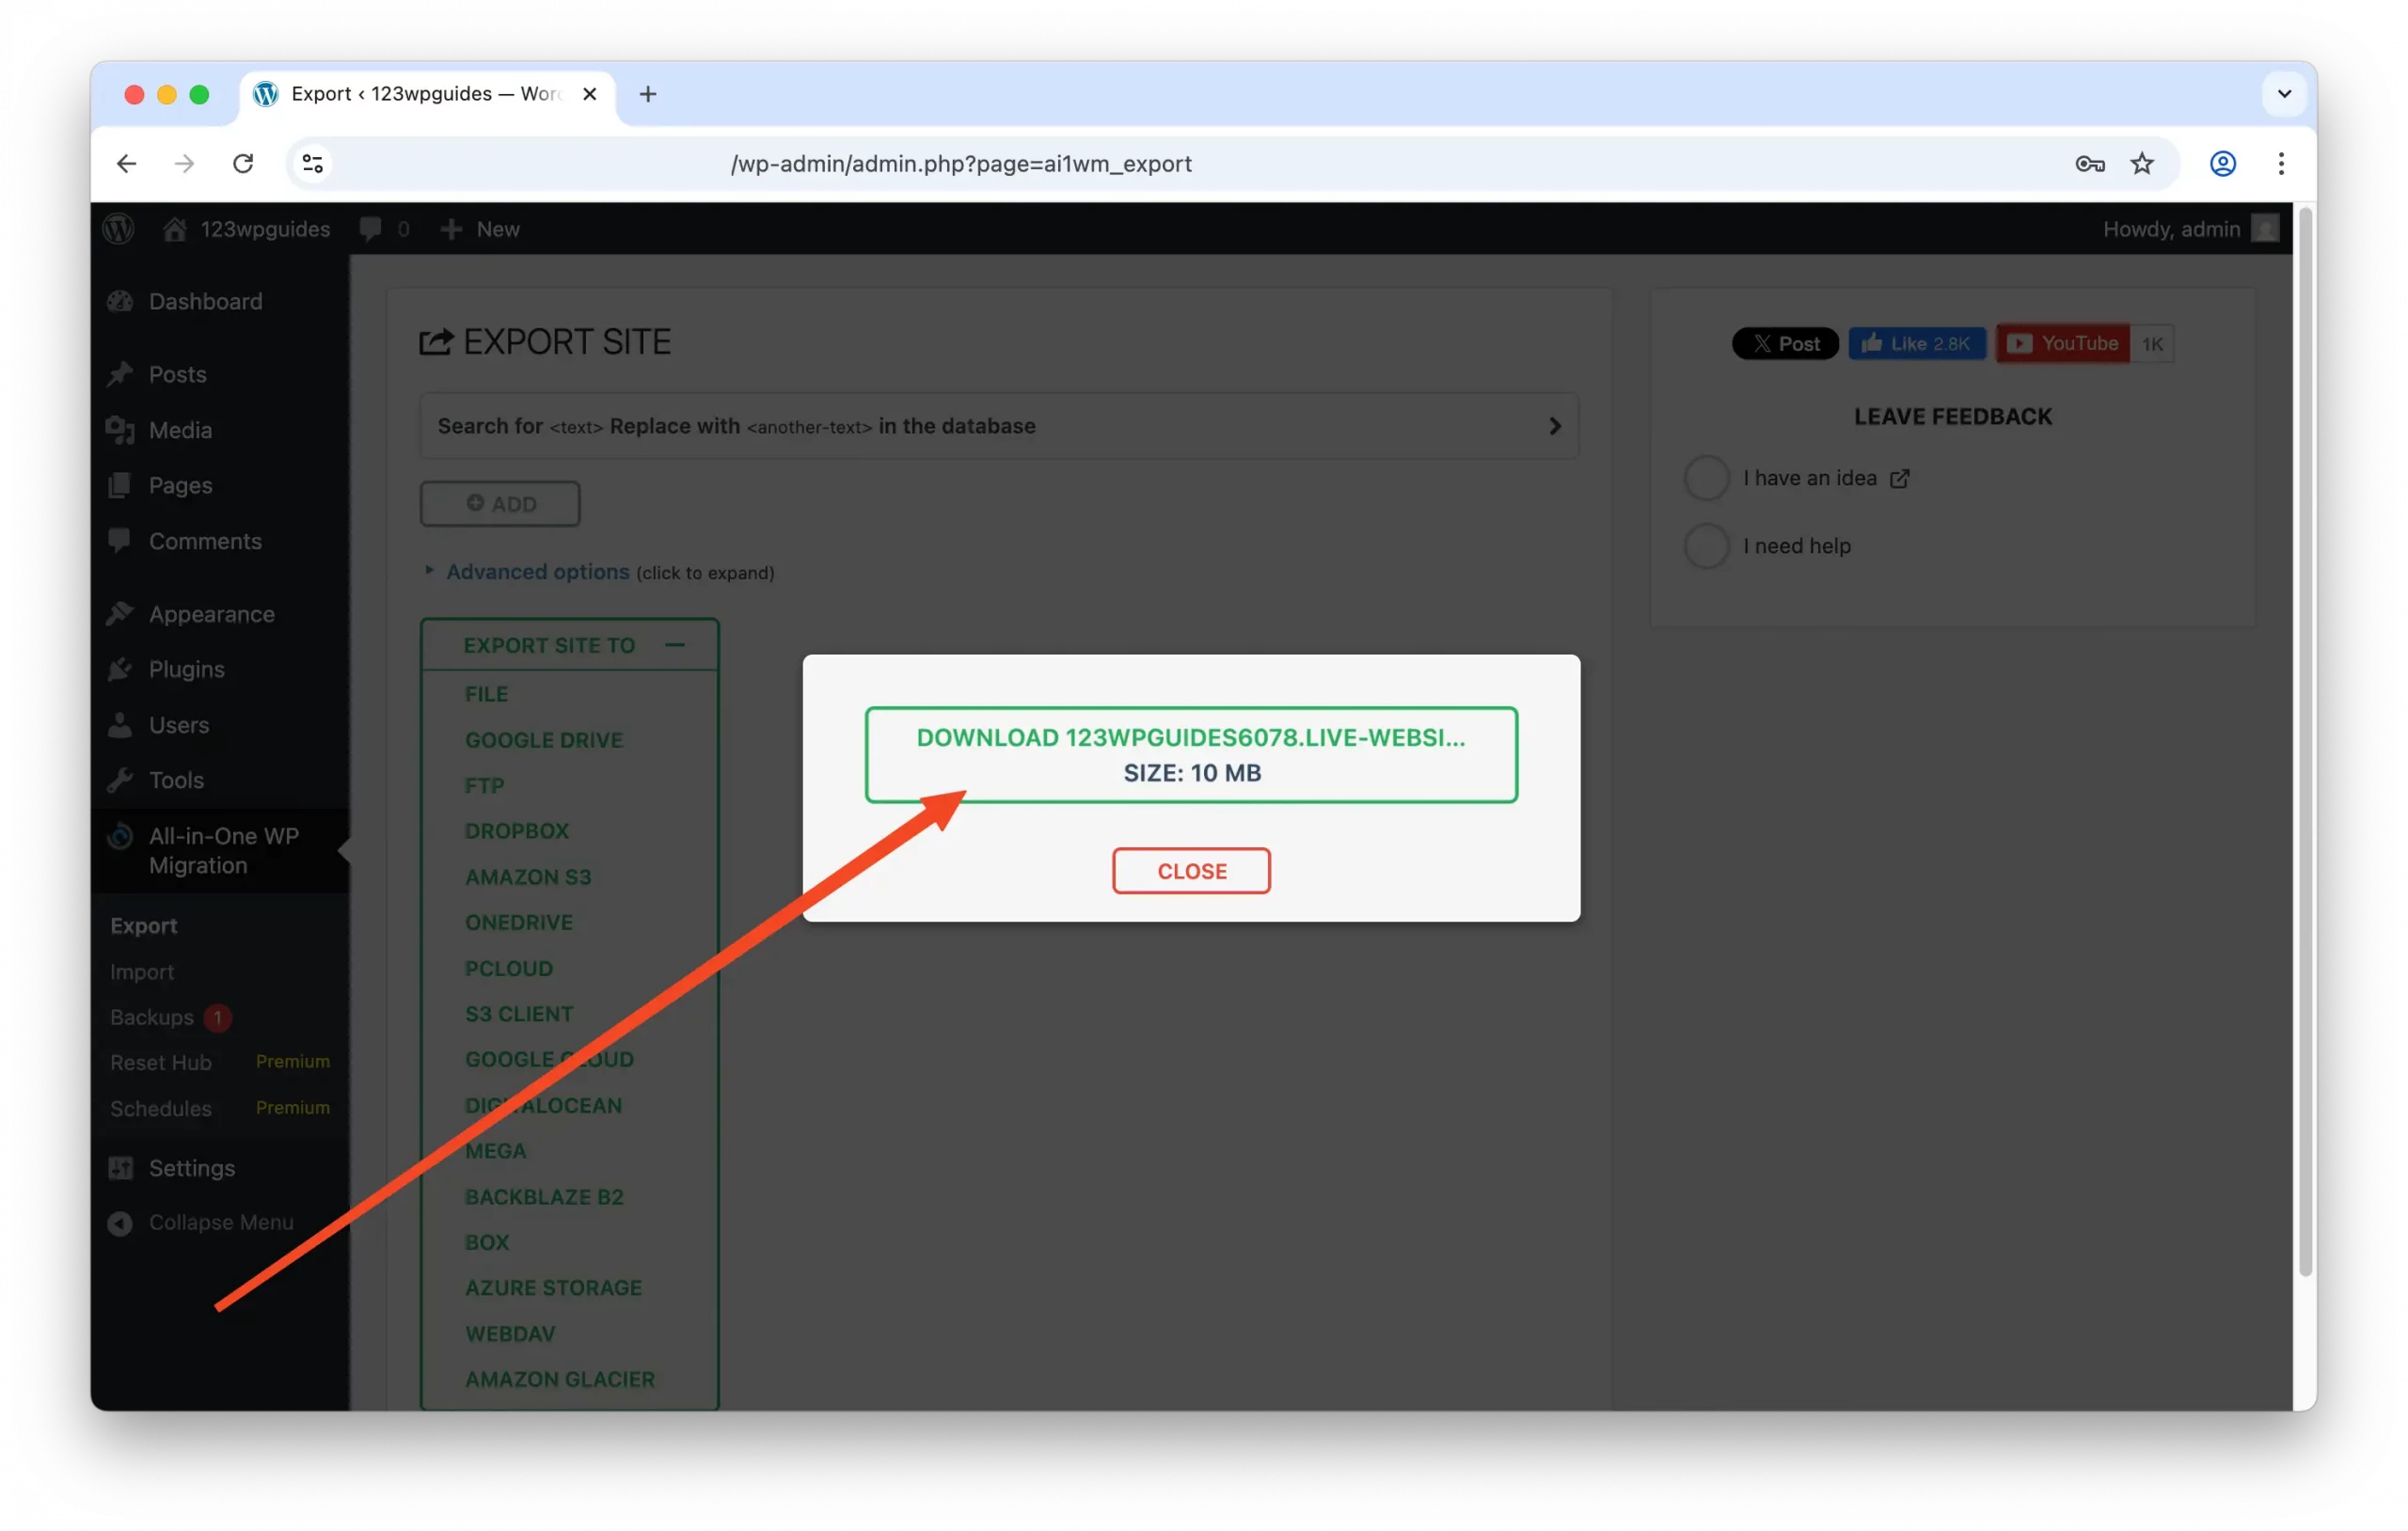
⬇️ Step 5: Download the Backup File
- Once the export is complete, a “Download” button will appear.
- Click it to download the
.wpressbackup file to your computer.
And that’s it! You can keep the backup copy of your website on your computer or send it to someone who needs a copy of your website (i.e., a support team that is troubleshooting an issue).